Technical Library
STRINGING II: Replacing a broken string
Entire Contents Copyright © 2010 CBHTechnical LibrarySTRINGING II: Replacing a broken string Entire Contents Copyright © 2010 CBH |
 Replacing
a broken string…
Replacing
a broken string…
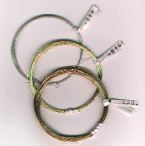
If you only do it once a year, replacing a broken string could prove more difficult for you than for a professional who in the course of his work might string twenty or more whole instruments in the same period. While it is nice to be able to exactly match the appearance of the existing strings, you should be mainly concerned with fitting a replacement that will hold pitch without breaking.
| DON’T REMOVE THE TUNING PIN UNTIL YOU ARE READY TO REPLACE THE STRING. |
If you break the job down into stages, it will become much easier for you:
1. Select your replacement wire. Study the stringing schedule which came with your instrument to determine the correct wire material and diameter. If you don’t have a schedule, or a means of measuring the broken string, contact the maker or a technician.
2. Give yourself clear access by removing the jackrail. On most instruments, it’s quite ok to leave the jacks in the immediate area in their slots, but some people feel more comfortable clearing one or two of those out.
3. Now you are ready to make the loop which will bear the tension of the string.
4. Finally, you must wrap the wire around the tuning pin, insert the pin in its hole in the wrestplank, and pull the note up to pitch.
| Technical Library overview | |
| Harpsichords Australia Home Page |